 |
| Ford with Blue Truck Parts screw retainers |
Starting in the mid 70's Ford begin using plastic screw holders on the back of their instrument cluster gauges. Over the years the plastic has become brittle and cracked. This allows the gauges to rattle inside the cluster. In extreme cases the screw, which also is used to conduct the gauge signal, can touch to the gauge body and cause a short or worse.
Identification
Ford seems to have standardized their gauges across all vehicles and lines through most of the 70's and the first half of the 80. Their fuel, oil pressure, and temperature gauges are all roughly the same design with minor variations of needle width and direction of operation. They all have a round metal housing that is roughly 1 3/4" in diameter Two screw posts spaced 1 1/8" apart hold the gauge in place and conduct the sensor signal in to the gauge internals. The posts 3/16" diameter, or #10 screw size. The amp gauges are similar, but have a thicker metal housing.
 |
| Gauge screw posts spaced 1 1/8" apart |
The gauges are held into the cluster using thin speed nuts. Typically the clusters have a plastic housing and a flexible circuit board.
 |
| Example Gauge Cluster from an 86 F150. |
The gauges were used almost all (if not all) Ford, Lincoln, and Mercury vehicles from the early early 70's through the mid 80's. Some of the more popular vehicle using this style gauges are:
- 1973-1979 F Series Trucks (F100, F150, F250, F350)
- 1980-1986 F Series Trucks (F100, F150, F250, F350)
- 1978-1979 Bronco
- 190-1986 Bronco
- 1974-1978 Mustang
- 1979-1986 Mustang
Repair Process
Start by removing the gauge cluster from the vehicle, disassemble and remove the gauges from the cluster. Use caution when removing the nuts holding the gauges in place. When the plastic holder are badly cracked the posts can spin breaking the attached wire inside. You may need to use pliers to hold the post while removing the nut. Also be very careful working with the gauge. The needle on the front is easily bent destroying the gauge.
 |
| Inspect the gauges. The image above points out the cracked screw holders.
|
 |
Use a small screwdriver to pry up the metal taps holding the screw holder in place.
|
 |
| Gently push the screw posts out of the broken holder and inside the cluster. Remove the broken holder. DO NOT pull the posts out for the gauge. Be very careful, the wires connected to the posts are very delicate and easily broken. |
 |
| Place the new holder over the screw posts and metal tabs. The holder should be installed with the flat side out and the thick rings inside the gauge. |
 |
Use the screwdriver to push the metal tabs back into place.
|
 |
| Gently pull the screw posts up and seat them into the back side of the plastic holder. Be careful not to spin them. |
 |
| Use a small washer and one of the gauge mounting nuts to pull the screw post up until it's fully seated in the new holder. Again be careful not to spin the screw post. |
 |
Verify the screw posts are fully seated. You should be able to see the end of the threads and just barely see the post knerlying just inside the screw hole.
|
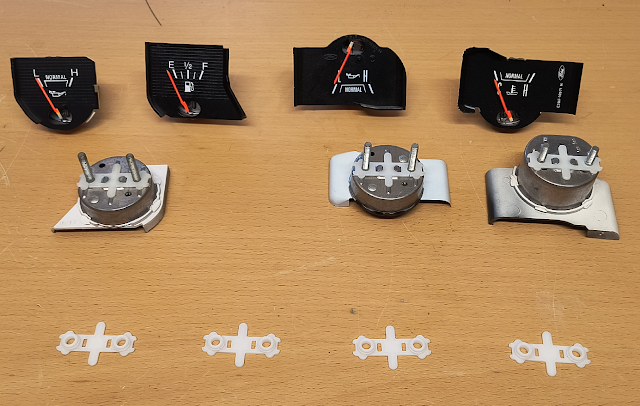
The gauge screw retainer parts are available for sale at the
Blue Truck Parts online store.


Comments
Post a Comment